How to wrap text around an image in Adobe IllustratorLearn how to wrap text around a shape using the Text Wrap Tool in Illustrator. I was going to use a monospace font and would like it to wrap as precisely as possible regardless of weather or not there is a space.
 Wrap Text Around Images And Graphics In Indesign Adobe Indesign Tutorials
So were going to learn how to warp stuff.
Wrap text in illustrator. This feature can add a bit of creativity to any piece. Today an Illustrator tutorial where you will learn how to wrap text easily in Adobe Illustrator. Halloo dumenity pada artikel ini saya akan mengajarkan text wrap pada illustrator.
With this new shape selected go to Object Text Wrap Make. Is there any way to do that. Prepare the Text for Warping.
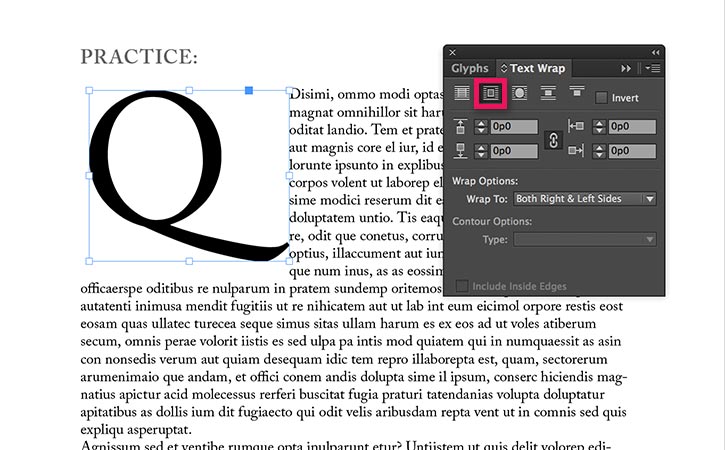
Step 2 Now select Type Tool form the Tool Panel and click on the artboard to type your text. The graphic is forcing the text to wrap around it. Wrapping text in Adobe Illustrator CC isnt quite the same as wrapping a present its easier.
By starting with creating a new document create a shape in which you want to wrap your text. And we can go to the Character panel at the top and we can pick a fontlets go for Gotham Bold. Bagi yang terbiasa menggunakan illustrator untuk membuat sebuah persentasi atau membuat layout text wrap ini di gunakan.
Now go to File in the Menu Bar and click on Place to browse and add the image around which you want to wrap the text. With the help of the Text Wrap Tool we can wrap text in illustrator inside and around the shape object image or artwork created in the illustrator. Wrapping text is an AWESOME technique for designs such as br.
Create a text object select it then go to Object Envelope Distort Make with Warp. Lets launch Adobe Illustrator and begin with the illustrator tutorial. Illustrator also allows you to use tools to change distort and warp Illustrator objects and text.
Text wrap adalah mengatur sebuah objek dengan berkaitan text wrap. I was trying to wrap text to the inside of a compound object. Then Im going to go to the alignment options and select Align Center so that its in the middle.
A text wrap forces text to wrap around a graphic as shown in this figure. Wrap Text Around A Circle with Illustrator. Always create a closed path shape for this effect otherwise you wont be able to wrap the text in a shape.
They are also commonly called envelope distortions Creative Suite 5 CS5 uses the Effects Menu to choose different warp distortions for an object. This will place text around the perimeter of the circle that you can edit to your liking. Like it would just break the text at any point without adding a hyphen.
To wrap your text around a circle in Illustrator simply grab the Type on a Path Tool and click on the circle that youd like the text place around. Step 1 Start with launching Adobe Illustrator and creating a new document. Make sure you also learn how to undo your changes.
Text-wrapping is often used in graphic design to create integrated professional-looking images that stand out. The first way in which you can warp text into shapes with Illustrator is by using the make with warp feature. In this tutorial well be learning how to wrap text in Adobe Illustrator- - - - - - - - - - - - - - - - - - - - - - - - - - - - - - - - - - - - - - - S.
In this tutorial were going to learn how to create a text envelope distort effect in Adobe IllustratorWater Droplet Icon Tutorial. Click on the artboard to activate the type box and now type the text which you want to wrap around the sphere. Lets grab our Type Tool left click anywhere on the artboard and type some textLets type WARPED.
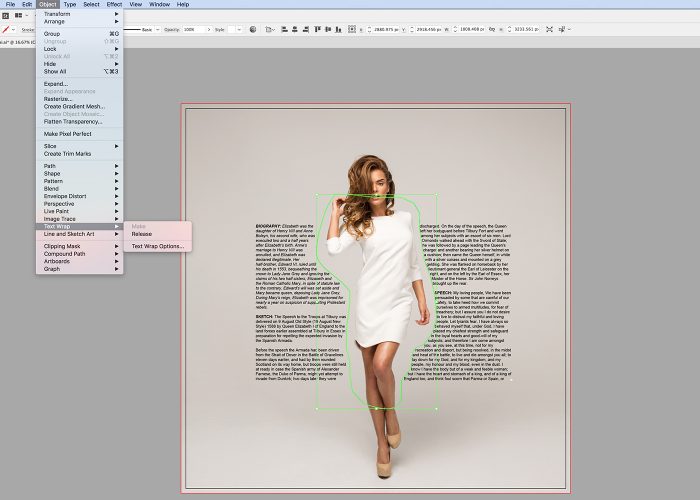
Step 1 Create a new document and select the Type Tool. In this illustrator tu. To wrap text around any Adobe Illustrator object bring the object to the front of the document then navigate to the Text Wrap option in the Object menu.
Now illustrator will show this message for warping this text. The way you change or warp objects and text differs from 1 version of Illustrator to another. To allow the text to wrap around the actual body of the frog use the Pen Tool to draw in a make-shift shape following the outline of the frog.
Learn how to use the Text Wrap tools in Illustrator to wrap your text around a shape photo drawing or any imported object. I was trying to make a shape poem for an. This allows you to transform your text into a series of different predetermined shapes.
The text now flows around the previously created object and in turn gives the impression that it is wrapping around the frog image. Now place this text above the paragraph and go to Object menu go to Text Wrap option of the drop-down list of Object menu then click on the Make option.
It is a useful way of creating the look of cropping an image without having to move into Photoshop to create a true crop. Touch shortcuts and gestures.
 How To Create Text Mask In Adobe Illustrator Tutorial Youtube
Its just below the text tool T near the top of the toolbar on the.
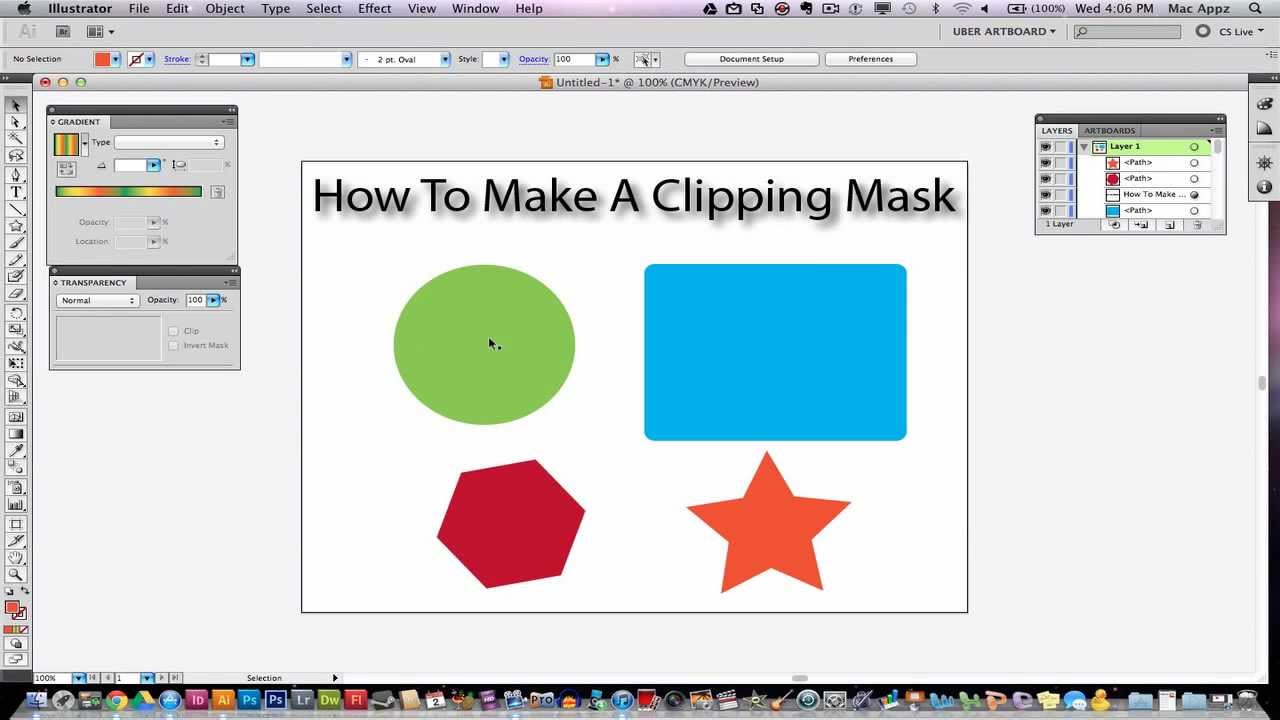
How to create a clipping mask in illustrator. Select all and go to Object Clipping Mask Make. If you are New then Dont forget to subscribe. Illustrator on the iPad workspace.
How to Create a Clipping Mask in Adobe Illustrator CS6. As always thanks for watching. Then you can select both the object and the photo and make a clipping mask out of them by right-clicking and selecting Make Clipping Mask.
System requirements Illustrator on the iPad. Reproducing an image without acknowledging the artist or paying for its use is illegal. I Will Show You How To Create Clipping Mask In.
In the Layers panel make sure that the masking object is. Select or create a vector shape for your mask. Make clipping mask Select both the image as well as the shape triangle.
And with that you are finished. Select or create a vector shape for your mask. Select all and go to Object Clipping Mask Make.
This is the shape that you want to fill. Make sure the shape is on top of the image. See how to mask an image in text and make stunning text effects.
Now select the original artwork and then press and hold Shift and click on the clipping mask to select it. Move the clipping path and the objects you want to mask into a layer or group. This object is called the clipping path.
Its in the menu bar in upper-left of the screen. Use the Selection tool to select the placed image and the shape. You can also just hit 7 or Ctrl7 on a PC.
Create a clipping mask for a group or layer Create the object you want to use as the mask. To use the shortcut for making clipping press command 7. When both the artwork and clipping mask are selected Go to context menu and select Make Clipping mask.
Long-click and release on the shape tool. Introduction to Illustrator on the iPad. You can also create a clipping mask by selecting the cruise ship layer holding down the ALT key and clicking between the ship layer and the Shape-2 layer.
Click on a tool. Make sure the photo or image is ethically sourced. Place the vector on top of the background image or images and resize.
Illustrator on the iPad FAQs. For free images go to Creative Commons. Create a clipping mask by right-clicking on the cruise ship layer and selecting Create Clipping Mask.
Illustrator on the iPad. The video tutorial describes the use of Clipping Mask in Adobe Illustrator and how to use it. This is the shape that you want to fill.
What you can or cannot do on Illustrator on the iPad. That is how you can make a clipping mask with text in Illustrator. If its not on the top then you can select Arrange- Bring to Front from the Context Menu or can Press ShiftCtrl to bring it at the top.
To create a clipping mask you will need an image or photograph to nest inside of a shape. Ways to create a clipping mask Once you have your objects arranged they need to be you can create a clipping path by going to Object Then Clipping Mask and then choose Make. Click New to create a new file or image to mask.
The shape will be created in Illustrator. A clipping mask is an object whose shape masks other artwork so that only areas that lie within the shape are visiblein effect clipping the artwork to the shape of the mask. Ways to release a clipping mask.
Keyboard shortcuts for Illustrator on. Illustrator on the iPad overview. Create the item you want to use as a mask by using the Pen tool to create a shape or a closed path.
Clipping masks allow you to make one object take the shape of another object. Choose FilePlace to place an image. Place the vector on top of the background image or images and resize.
If you have any questions simply leave a comment below and be sure to check out some of my other Illustrator tutorials. Compound paths are a powerful tool and today were going to learn how to use them to create a clipping mask from multiple shapesThanks for watchingTipTutZ. Only vector objects can be.
Place the clipping mask immediately above the original art work. Welcome to my channel Aram Academy.